Showing posts with label Cakes. Show all posts

Tuesday, 13 November 2012

Bonfire Cupcakes (Chocolate & Ginger)

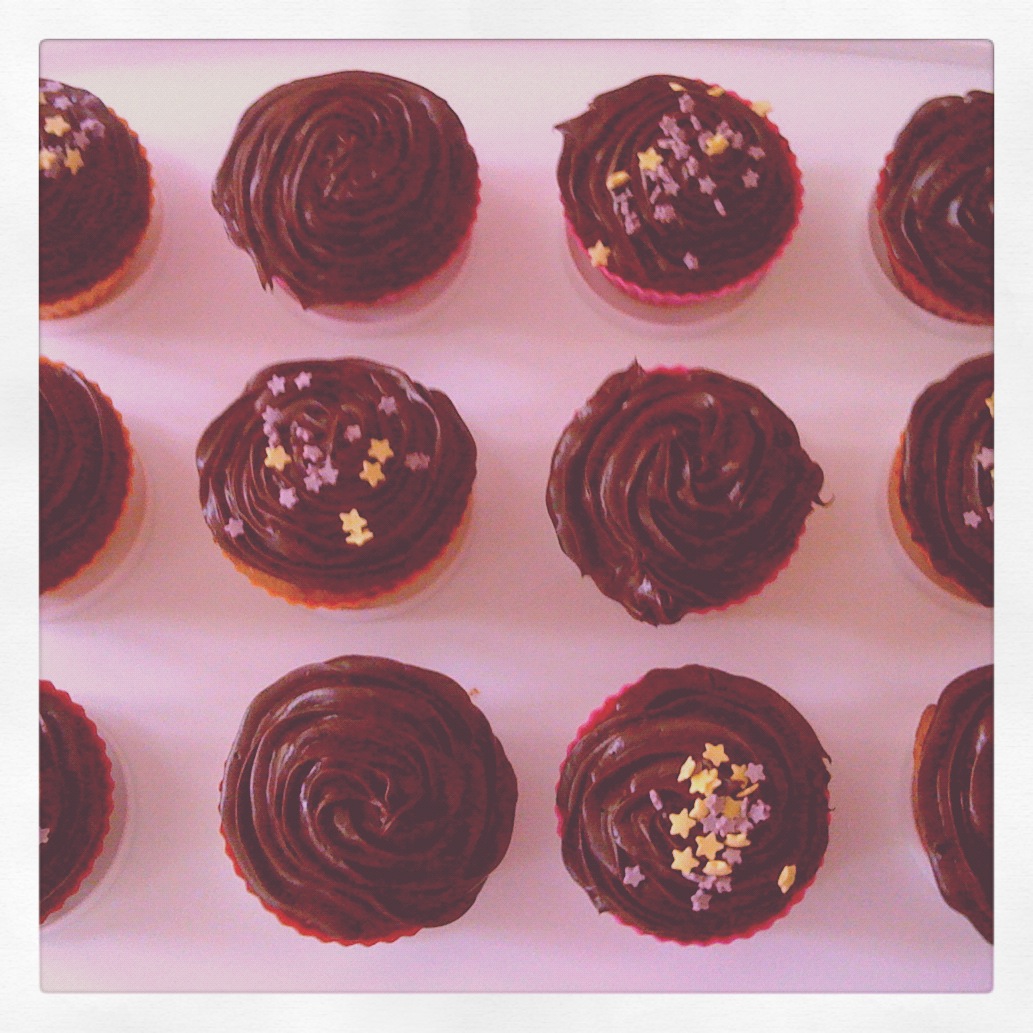
I decided to make these for a fireworks party but I think they're a great autumn/winter cake. I tried to base these cakes on the posh ginger buscuits (covered in dark chocolate) that you tend to get around this time of year. Chocolate is always a winner but with the little bit of heat that the ginger gives these feel like a warm fire. They're also great fun to decorate because, since it is a bonfire, you can use lots of glitter :)

Ingredients:

200g Butter or Margarine
200g Caster (Golden) Sugar
170g Self-raising flour
30g Cocoa Powder (Mixed with 2 tbs of milk to form a paste)
4 eggs
Pinch of Salt
1 tsp Baking Powder
2-4 tsp Ground Ginger (Depending on how gingery you want it)

Method:

1. Preheat oven to 180°c or Gas Mark 5.
2. Cream butter and sugar together. Then stir in the cocoa powder paste till it's all combined.
3. Whisk eggs in a separate bowl to get lots of air in.
4. Weigh all the dry ingredients in another bowl and mix together. At this point add 2, 3 or 4 tsp of ground ginger. I think 3 would probably be the right amount and then add more if you want it to be more firey or less if you're not too keen on too much ginger.
5. Then add about a quarter of the eggs. Beat together and add some flour if the mixture starts to curdle. Keep doing this until all the egg is combined with the butter and sugar.
6. Slowly add the rest of the flour and fold in with a large metal spoon so not to overwork the gluten, this will help your cupcakes rise.
7. Spoon the mixture into the cupcake cases, a little over half way to account for rising. Try and make sure they're all level so you can achieve a nice effect when they're displayed.
8. Bake for between 15 - 20 minutes depending on how big your cupcakes are.
9. Once you take the cupcakes out of the oven leave them to cool for five minutes before transferring to a cooling rack.
10. Leave to cool completely before decorating otherwise your hard work will just melt!

For decoration this is entirely up to you but I can let you know what I did for the cakes below. I used a ready made icing (Betty Croker Chocolate Buttercream Style icing) because it has a rich chocolate flavour and it needed to be used up from the cupboard. I then grated Green & Blacks Ginger chocolate on top of the icing and added plenty of glitter. I then finished the cakes off by sprinkling crumbled ginger buscuits on top. Then look firey and add more to the giner flavour.

- Emma xxx


Sunday, 28 October 2012

Chocolate and Banana Cupcakes

Now this recipe is an adaptation of my carrot cake recipe. Now I've just listed banana and chocolate as the flavour but you can add walnuts to give the cake an extra crunch.

Ingredients:

250g Banana's
250-300g Chocolate Chips (Dark and Milk)
150g Margarine
200g Self-raising Flour
200g Brown demerara sugar
2 large eggs
1/2 tsp Salt
1 tsp Vanilla Extract
2 tsp Baking Powder

Method:

1. Preheat Oven to 180°c.

2. Mash the banana's and mix in the vanilla extract.

3. Beat the sugar and the margarine together.

4. Add beaten eggs and the banana to the mixture and whisk to get some air in to the mixture.

5. Combine the dry ingredients together and add them a little add a time to the mixture. Folding the flour in and no trying to overwork the mixture. Once the mixture is combined add the chocolate chips. (If you want to add walnuts add them here)

6. Spoon the mixture either in to 12-18 cupcake cases, 8 mini loaf cases, a loaf tin or a cake tin. This mixture is really great and adjusts well for all forms.

7. Bake for 18 minutes (cupcakes) 20 minutes (mini-loaf) and 25-35 depending on how big the tins are, I would fetch them out the oven when they look like they're starting to go a darker brown.

8. Leave to cool on a baking tray. They don't need to be decorated and icing doesn't go too well with these cakes. Though if you wanted to add a chocolate buttercream I'm sure that would still taste okay.

- Emma xxx


Monday, 25 June 2012

Lemon Drizzle Cupcakes

This recipe was created because I wanted to take some cakes to work and they wanted lemon. I didn't want to make a large one because I would then have to bring a knife! So these are my lemon drizzle cupcakes, building on the vanilla cupcake recipe.I like to use the yellow food colouring because it makes the cakes pop a little bit.

Ingredients:

200g Butter or Margarine
200g Caster (Golden) Sugar
200g Self-raising flour
4 eggs
Pinch of Salt
1 tsp Baking Powder
2 tsp Yellow Food Colouring
3 tsp of Lemon Juice

For the drizzle:

5 tsp Lemon Juice
30g of Caster sugar

Method:

1. Preheat oven to 180°c or Gas Mark 5.
2. Cream butter and sugar together.
3. Whisk eggs in a separate bowl to get lots of air in.
4. Weigh all the dry ingredients in another bowl and mix together.
5. Add the food colouring and lemon juice to the butter and sugar, then add about a quarter of the eggs. Beat together and add some flour if the mixture starts to curdle. Keep doing this until all the egg is combined with the butter and sugar.
6. Slowly add the flour and fold in with a large metal spoon so not to overwork the gluten, this will help your cupcakes rise.
7. Spoon the mixture into the cupcake cases, a little over half way to account for rising. Try and make sure they're all level so you can achieve a nice effect when they're displayed.
8. Bake for between 15 - 20 minutes depending on how big your cupcakes are.
9. Whilst the cupcakes are in the oven prepare the lemon drizzle. Mix the lemon juice and the caster sugar together until completely combined.
10. Once you take the cupcakes out of the oven leave to cool for five minutes before transferring to a cooling rack. Then stab the cupcakes with a cocktail stick, making sure not to stab all the way to the bottom. Then with a cooking brush, brush the lemon drizzle over the cupcakes. Repeat this process twice for each cupcake.
11. Leave to cool completely before decorating otherwise your hard work will just melt! To decorate use icing sugar and lemon juice to form a thick, smooth icing. Spread this over the cupcakes and add sprinkles!

- Emma xxx


Red Velvet Cake

This recipe is basically double the cupcake recipe. It's a huge cake. I've baked it just in one tin, but normally it's baked in two or three. My oven at university isn't big enough for this but I think it worked well in one tin and my friend's birthday cake still looked great!

Ingredients:

250g Butter
600g Sugar
6 eggs
4 tbs Cocoa Powder
1 tsp Red Food Colouring Paste (Or 5 tbs of Red Food Colouring)
380g Self Raising Gluten-Free Flour
270ml Buttermilk
2 tsp Vanilla Extract
Large Pinch of Salt

Method:

1. Preheat oven to Preheat oven to 180°c or Gas Mark 5.
2. Cream butter and sugar together.
3. Soft the Cocoa powder into the butter and sugar and mix well. Once combined at the food colouring and vanilla extract.
4. Add the eggs one at a time and mix well. I would use a whisk at this point to get in as much air as possible.
5. Weigh out the dry ingredients and mix together in a bowl.
6. Then alternate between adding the dry ingredients and the buttermilk, folding in the flour so your don't lose the air.
7. Once the mixture is fully combined, pour the mixture in to the round tins (1-3) making sure to smooth the tops.
8. Put in the over for about 30-50 minutes (depending on how many tins you used) until the mixture is slightly browning on top.
9. Remove the tins and leave to cool in the trays for 10 minutes before transferring to a cooling rack.

10. Once it's fully cooled you can ice and decorate! Traditionally red velvet is made with a cream cheese frosting but because I'm not really a fan (and neither are my friends!) I make them with butter cream. We made this particular cake with vanilla butter cream. So 1 part butter, 2 parts icing sugar and a tsp of vanilla extract. You could cut the cake it half (we didn't have a big enough knife!) and layer buttercream inside the cake as well.

This particular cake I decorated with my friend Harri, it was for our friend Hayley's 21st. We had SO much fun. We used purple ready to roll icing and stuck sugar flowers on the cake. We also made leaves and stems. As you can see the red worked really well with the purple!

- Emma xxx


Friday, 8 June 2012

Gluten-Free Red Velvet Cupcakes

Hi, sorry I haven't posted in a while. I've just been finishing off my degree and I haven't really had time for baking, let alone writing recipes! Anyway, these were inspired by a red velvet cake I made for my friends 21st, I will post the details to this in my next post. I'll also give you a choice of icings because these cupcakes work with either chocolate or vanilla icing.

Ingredients:

125g Butter
300g Sugar
4 eggs (or three large)
2 tbs Cocoa Powder
1/2 tsp Red Food Colouring Paste (Or 3 tbs of Red Food Colouring)
190g Self Raising Gluten-Free Flour (Or 190g of normal Plain Flour with 1/2 tsp bicarbonate of soda)
125ml Buttermilk
1 tsp Vanilla Extract
Pinch of Salt

Plus if you're doing the Gluten-Free Version put in 1 tsp of Gluten-Free Baking Powder.

Method:

1. Preheat oven to Preheat oven to 180°c or Gas Mark 5.
2. Cream butter and sugar together.
3. Soft the Cocoa powder into the butter and sugar and mix well. Once combined at the food colouring and vanilla extract.
4. Add the eggs one at a time and mix well. I would use a whisk at this point to get in as much air as possible.
5. Weigh out the dry ingredients and mix together in a bowl.
6. Then alternate between adding the dry ingredients and the buttermilk, folding in the flour so your don't lose the air.
7. Once the mixture is fully combined, line the cupcake tray with cases and put the mixture into the cases. (I managed to make 20 cupcakes with this mixture but it really will depend on how full your cases are and how big they are)
8. Put in the over for about 18-20 minutes until they're slightly browning on top.
9. Remove the trays and leave to cool in the trays for 5 minutes before transferring to a cooling rack.

10. Once they're fully cooled you can ice and decorate! Traditionally red velvet is made with a cream cheese frosting but because I'm not really a fan (and neither are my friends!) I make them with butter cream. I usually divide them in to chocolate and vanilla so I have contrasting colours.

Ingredients are 1 part butter and 2 parts icing sugar. Once the mixture is light and fluffy add either cocoa powder or vanilla extract.

- Emma xxx


Saturday, 10 March 2012

Gluten Free Cinnamon Cupcakes

I originally did this just before Christmas as I love cinnamon and it just feels so christmassy to me. I've done slight variations like cinnamon and ginger so feel free to add some ginger as well but I thought I'd just give you the basic recipe. I have stated these as gluten free but it's not difficult to change that to normal flour if you don't want to make them gluten free. Decorate as you wish but I tend to use a cinnamon or ginger (or both!) butter cream.

Ingredients:

180g Gluten-free Self-raising Flour
180g Butter or Margarine
180g Demerara Sugar
4 Eggs
1 tsp of Cinnamon (and or 1 tsp of ginger)
1 tsp of Gluten-free baking powder

For the icing:
100g Butter
200g Icing Sugar
1 tsp of Cinnamon (or 1tsp of ginger)

Method:

1. Preheat oven to 180°c or Gas Mark 5.
2. Cream the butter and the sugar together, it won't be as using caster sugar but the brown sugar caramelises well with the cinnamon.
4. Whisk the eggs in a separate bowl and mix really well because gluten free needs help to rise. (I sometimes even separate the eggs and whisk them, the egg whites really help it to rise.)
5. Weigh the dry ingredients in a bowl and stir together.
6. Then about a quarter of the eggs to the butter and sugar. Beat together and add some flour if the mixture starts to curdle. Keep doing this until all the egg is combined with the butter and sugar.
7. Slowly add the flour and fold in with a large metal spoon so not to overwork the gluten, this will help your cupcakes rise.
8. Spoon the mixture into cupcake cases, try and get them all level.
9. Bake for about 15 - 20 minutes depending on how hot your oven gets and how big your cases are.
10. Leave to cool before decorating.

11. For the icing beat the ingredients together until smooth then either spread or pipe the icing on to your cakes.

- Emma xxx

Cupcakes

This is a simple recipe for one of my favourite things to bake (and eat!) I love to decorate them and I always think they look really pretty. Anyway, this is just a simple but full-proof recipe for cupcakes. Either vanilla or chocolate ones. Really easy to bake and then you can have lots of fun decorating them, they work for birthdays, holidays or just because. Makes 12 -18 depending on how big your muffin cases are.

Ingredients:

200g Butter or Margarine
200g Caster (Golden) Sugar
200g Self-raising flour
4 eggs
Pinch of Salt
1 tsp Baking Powder
1 tsp Vanilla extract

For the chocolate version have 180g of self-raising flour and between 20-40g of cocoa powder depending on how chocolatey you want them.

Method:

1. Preheat oven to 180°c or Gas Mark 5.
2. Cream butter and sugar together.
3. Whisk eggs in a separate bowl to get lots of air in.
4. Weigh all the dry ingredients in another bowl and mix together.
5. Add the vanilla extract to the butter and sugar then about a quarter of the eggs. Beat together and add some flour if the mixture starts to curdle. Keep doing this until all the egg is combined with the butter and sugar.
6. Slowly add the flour and fold in with a large metal spoon so not to overwork the gluten, this will help your cupcakes rise.
7. Spoon the mixture into the cupcake cases, a little over half way to account for rising. Try and make sure they're all level so you can achieve a nice effect when they're displayed.
8. Bake for between 15 - 20 minutes depending on how big your cupcakes are.
9. Leave to cool completely before decorating otherwise your hard work will just melt!

Display your cupcakes in a fun way, my favourite is a stand that my mum got us and they just look fantastic.

- Emma xxx

Saturday, 12 November 2011

The 5 Minute Mug Cake

This is a must for students (or if you're just peckish and need something NOW!) It's not as good as the real thing but it comes awful close. All you need is a largish mug and a tablespoon.

Ingredients:

4 tbs Self-raising Flour
4 tbs Caster Sugar
1 Egg
3 tbs Milk
3 tbs Oil
1/2 tbs Vanilla Extract
Pinch of Salt

(For the chocolate version add 2 tbs Cocoa Powder and 3 tbs Chocolate chips)

Method:

1. Add dry ingredients to mug and mix well. Add the egg and mix thoroughly.

2. Add the milk and oil mixing well.

3. Add any other ingredients and stir until fully combined.

4. Place the mug in the microwave (maybe on a small plate just incase!) and cook of a high heat for 3 minutes.

5. Watch your cake grow! Don't be too alarmed if it goes over the top! Once it's cooked allow to cool a bit before tipping the cake out on to a plate.

6. Enjoy cold or warm with some ice-cream!

Please comment with pictures if you try making it, they tend to make rather ugly (yummy) cakes but there's something lovely and rustic about that! Have fun with this recipe, it is a lot like a school science experiement!

- Emma xxx

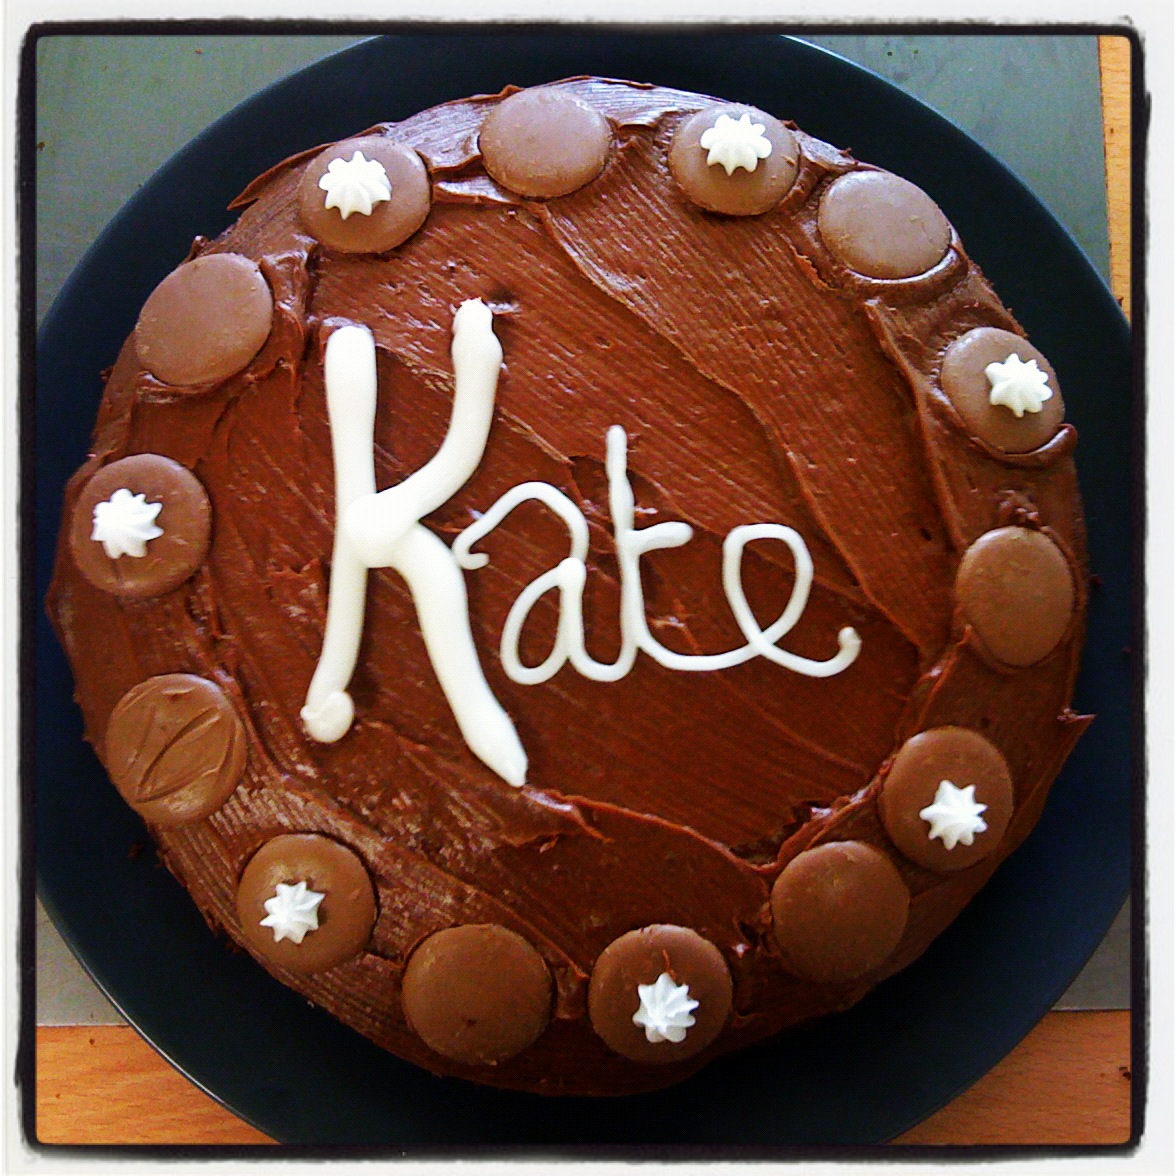
Easy Peasy Chocolate Cake

This recipe I've been using for a while, can't remember where it came from and I've definitely changed parts here and there but it's really easy to make and never fails (plus is tastes great!)

Ingredients:

275g Self-raising Flour
225g Margarine
225g Golden Caster Sugar (Or just Caster Sugar)
4 Eggs
20/30g Cocoa Powder
4 tbs Milk
1 tsp Baking Powder
1 tsp Vanilla Extract

Method:

1. Preheat oven to 180°c.

2. Beat the butter and the sugar together until fluffy and then add the milk.

3. Add the beaten eggs (adding a little flour if it curdles). Then add the Vanilla.

4. Slowly add the dry ingredients and fold in.

5. Spoon into the cake tin or cupcake cakes and bake for 20-45 minutes depending on what you're using. Cup cakes take less time than a large cake.

6. Once the cake is cooked put on a cooling rack and once it's cooled you can start to have fun decorating! Chocolate butter cream goes really well with this to give you a chocolate explosion.

7. Enjoy!

I tend to use this recipe for birthday cakes because it is so easy to make, tastes great but it is also really easy to manipulate. It's light and fluffy but it doesn't fall apart when you try and cut it. Great all rounder!

- Emma xxx

Tuesday, 8 November 2011

THE Carrot Cake

Now this recipe is my favourite. Use with caution! It may lead to endless baking and constant requests. It's also my favourite because it's the first recipe I would properly call mine. This is my carrot cake (wow that feels nice to say!) Now this is a plain carrot cake, you can add walnuts but I can't be dealing with that in my cake! So add nuts if you want it's just not really my style.

Ingredients:

250g Carrots (Peeled and chopped ends)
150g Margarine
200g Self-raising Flour
200g Brown demerara sugar
2 large eggs
1/2 tsp Salt
2 tsp Ground cinnamon
2 tsp Baking Powder
(2 tbs Milk if the mixture is really stiff)

Method:

1. Preheat Oven to 180°c.

2. Grate the carrots

3. Heat the margarine in a saucepan till melted then add it to the sugar. Beat well until it's combined and a smooth (as it can be) texture.

4. Add beaten eggs and the carrot to the mixture and whisk to get some air in to the mixture.

5. Combine the dry ingredients together and add them a little add a time to the mixture. Folding the flour in and no trying to overwork the mixture.

6. Spoon the mixture either in to 12-18 cupcake cases, 8 mini loaf cases, a loaf tin or a cake tin. This mixture is really great and adjusts well for all forms.

7. Bake for 18 minutes (cupcakes) 25 minutes (mini-loaf) and 25-35 depending on how big the tins are, I would fetch them out the oven when they look like they're starting to go a darker brown.

8. Icing: I know most carrot cakes have cream cheese frosting but no one close to me is a fan so I decided that cinnamon butter icing was a winner:

75g Butter
175g Icing Sugar
1 tsp Ground cinnamon

Beat all the ingredients together until you get a smooth icing, then pipe on to your cakes and decorate! I've made sugar icing carrots to decorate with before and they look very sweet (I think you can also buy these on eBay). I've also included different icing ideas in the pictures below - these are PERFECT for Halloween because of their colour!

- Emma xxx

After Eight Mint Cupcakes

These are fab! (IF you like after eights...if you don't I really wouldn't attempt unless they're for someone else) It's an adapted recipe from another book, changed it quite a lot, brought the ingredients back down to a sensible normal level and I think it works really well!

Ingredients:

16 After eight mints
160ml Water
90g Butter
220g Brown sugar (It doesn't matter what kind really, depends how dark/rich you like it)
2 Eggs
140g Self-raising Flour
1 tsp Baking Powder
3 tbs cocoa Powder

Method:

1. Preheat oven to 170°c.

2. Melt the mints and water in a saucepan until smooth, try not to boil it too much, on a low heat is fine.

3. Beat the butter and sugar until fluffy.

4. Whisk the eggs and add them a little at a time (add some flour if it curdles).

5. Add the water and melted mints and whisk until combined.

6. Then add the dry ingredients, carefully folding in the flour. Try not to overwork the mixture.

7. Divide the mixture into cupcake cases and bake for 20-25 minutes.

ICING & DECORATING:

The original recipe suggested a mousse topping for the cupcakes but I thought that would be too rich, however, if you want to try something like that or maybe a minty chocolate ganche then I think that would work too!

I tend to decorate mine with a simple vanilla butter cream (75g Butter, 175g icing sugar and a little bit of vanilla) and then a flower decoration. The picture below I cut flowers (using an icing cutting tool) out of after eights and they looked really pretty.

But I love icing so be inventive, it's often my favourite part of the baking process - so be creative!!

- Emma xxx